|
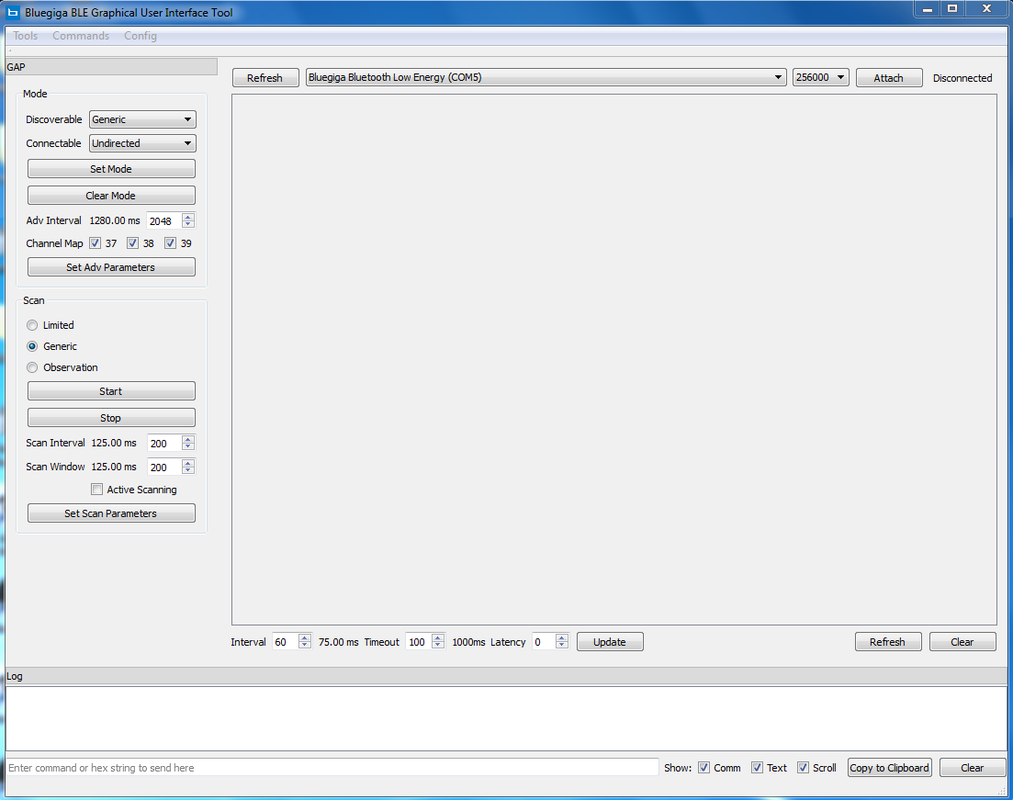
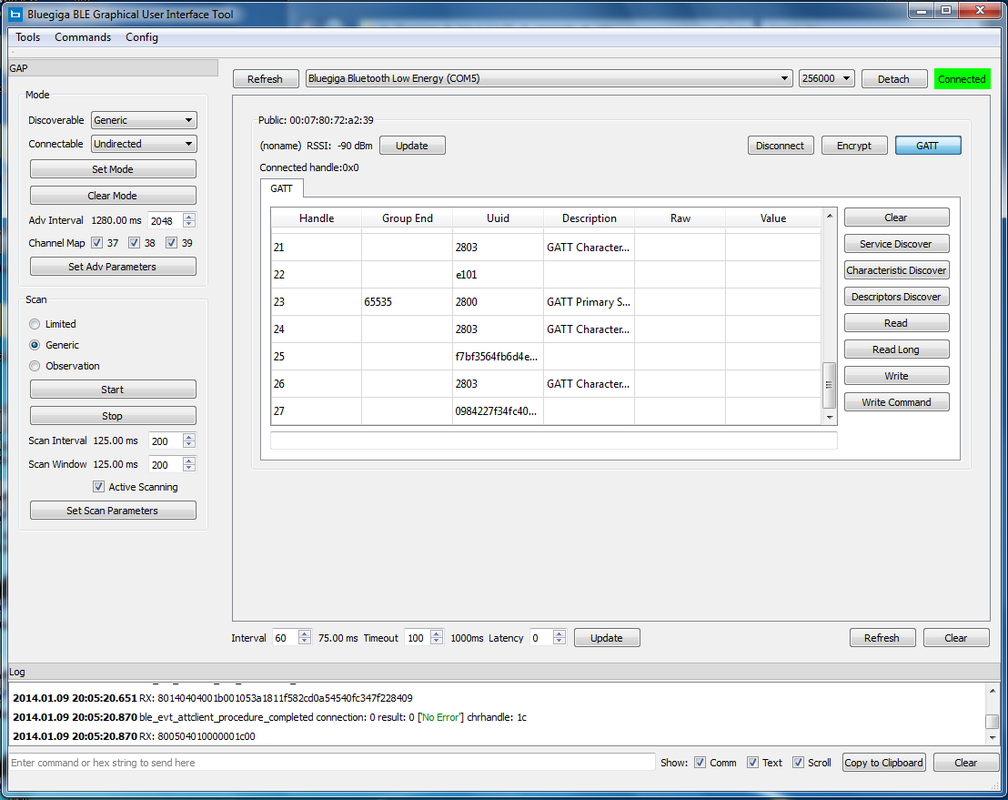
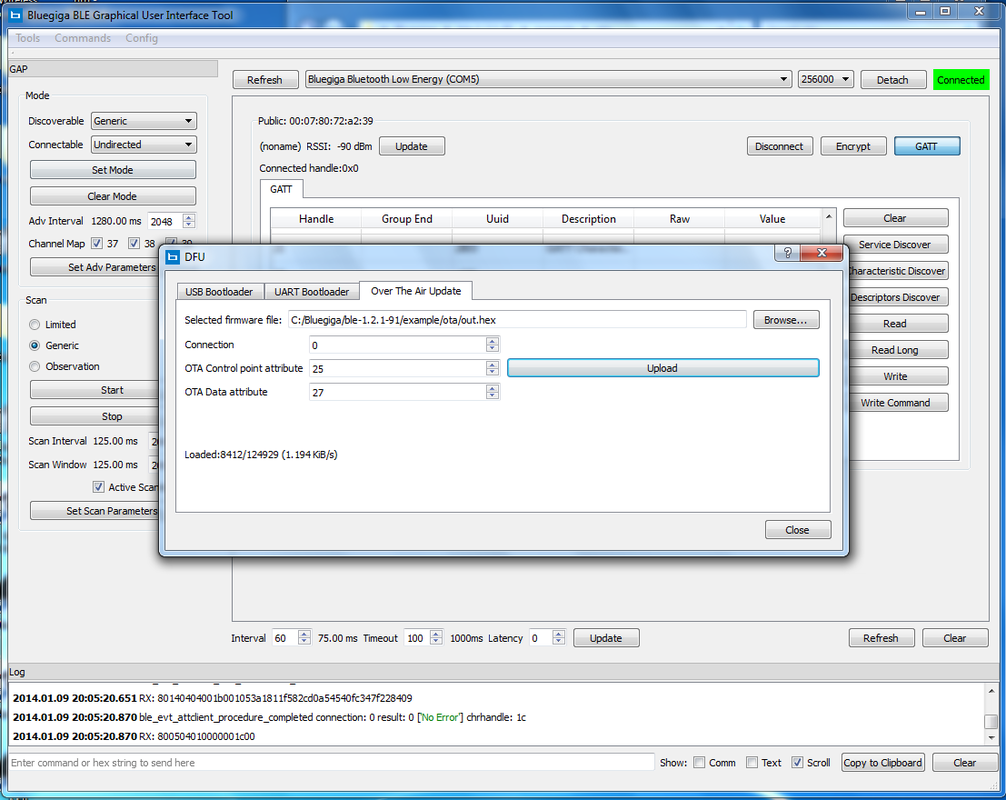
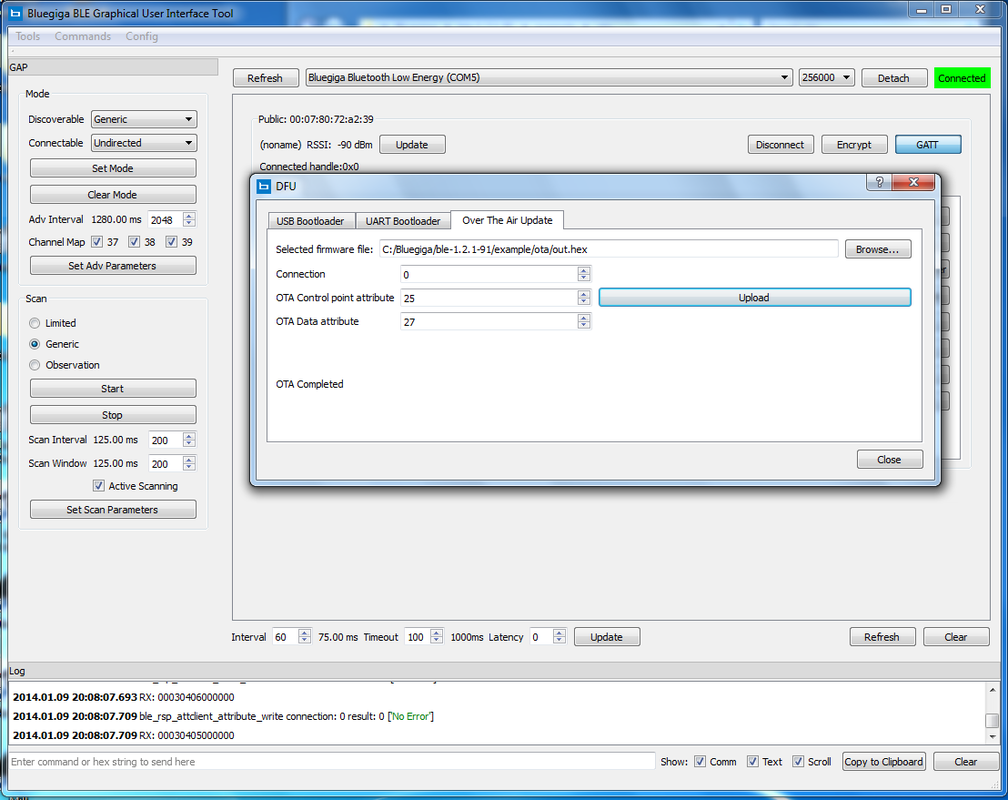
This is a brief overview of the OTA (Over The Air) firmware updating procedure for BLE112 or BLE113 systems equipped with the required hardware for OTA updates (like our BLE113 breakout board). This procedure (and our BLE113 breakout board) strictly follows Bluegigas APP NOTE for OTA updating. Requirements: - BLE112 or BLE113 system with required external SPI flash memory - BLED112 or our BLE112 breakout board to use a as BLE dongle on the updating computer - The NEWEST SDK from Bluegiga. This also installs all required drivers on your computer. Also the required BLEGUI program is inside the SDK. Procedure: 1. Ensure your target device is programmed with Bluegigas OTA example firmware contained in the SDK. For advanced users: Ensure your custom firmware contains the required code found in the APP NOTE or copied out of the OTA firmware example. 2. Power the target device and connect the BLED or BLE112 USB enabled breakout board to your computer. 3. Open Bluegigas BLEGUI program found in the bin folder of the SDK. 4. Bind the BLED112 or BLE112 breakout board to the GUI by selecting the required COM port and pushing the connect button (top right). 5. Enable active scanning and start a scan for devices. 6. Connect to the target device (which should appear in the search results). Click the GATT button. Then expand the services and descriptors. Notice the numbers beside the two 3rd party descriptors. These are the attributes required for the OTA process. On my boards it is #25 and #27. 7. Unselect the COMM and TEXT check boxes at the bottom of the page to speed things up. 8. Go to COMMANDS > DFU, then select the OTA tab. Select your target firmware and then enter the control and data points, again on mine it is control- 25 data- 27. Hit the update button. 9. When complete you will get an "OTA update process complete". That's it, hope this helps some of you!
1 Comment
|
Author
Peter Betz Archives
April 2020
Categories
All
|
Prices in US Dollars

 RSS Feed
